-
 Nefu
Nefu - 20 Dec 2025
- Security privacy
Hot vs. Cold Wallet: Your Ultimate Guide to Storing Crypto Safely
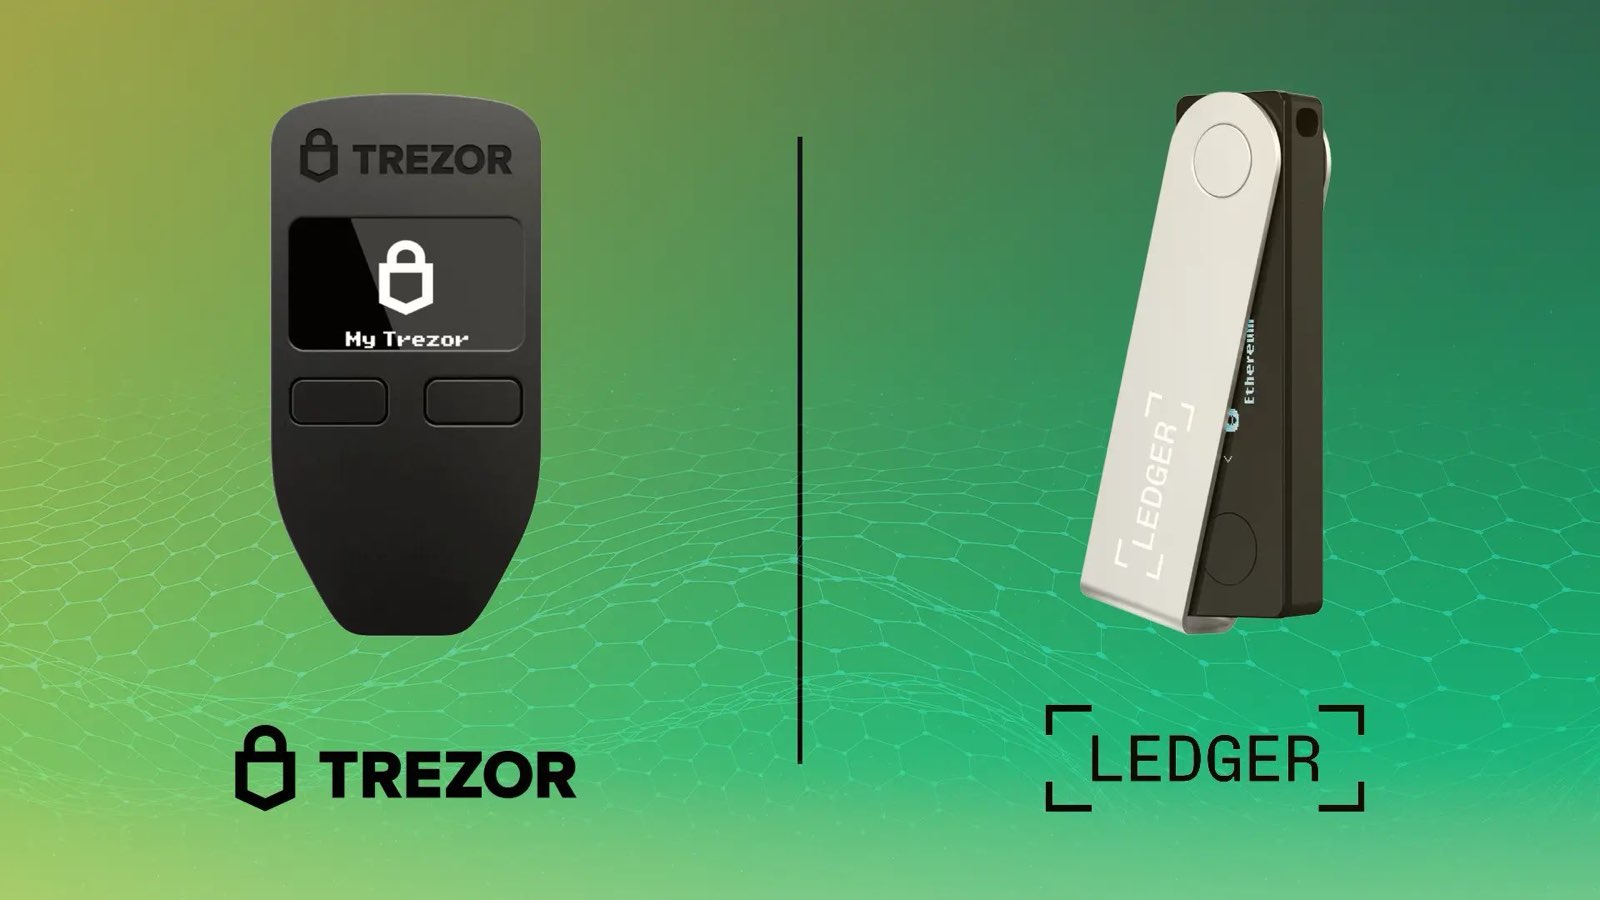
🧊 From Hot Wallets to Cold Storage: The Definitive Guide to Crypto Security If you're new to crypto, you've heard the golden rule: "Not your keys, not your coins (crypto)." This means you must take control of your funds away from centralized exchanges (like Coinbase or Binance). The tool for this? A wallet. But the world of wallets is confusing: Hot? Cold? Seed Phrase? This guide breaks down the essential differences, the core security principle that protects your funds, and the best tools for interacting with the Solana ecosystem.1. The Core Principle: Hot Wallets vs. Cold Wallets Every crypto wallet falls into one of two categories, based on its connection to the internet. This difference is the single most important concept in crypto security. 🔥 Hot Wallets (The Everyday Cash)Feature Description Example WalletsConnection Always connected to the internet. Phantom (Solana), Solflare (Solana), MetaMask (EVM)Security Risk Higher risk from malware, phishing links, and remote hacks.Best For Small amounts of crypto, daily trading, frequent use with dApps, and NFTs.A hot wallet is like your physical wallet—it’s convenient for everyday transactions, but you wouldn't keep your entire life savings in it. 🧊 Cold Wallets (The Bank Vault)Feature Description Example WalletsConnection Always kept offline (Air-Gapped). Ledger, Trezor, Keystone, TangemSecurity Risk Near-zero risk from online threats since the private keys never touch the internet.Best For Long-term savings, large amounts of SOL, HODLing, and digital inheritance.A cold wallet is a dedicated physical device (or set of cards) that is disconnected from the internet. When you want to sign a transaction, the device signs the transaction offline, and then the transaction is broadcast to the network. Your secret key never leaves the device.2. The Unbreakable Rule: The Seed Phrase Regardless of whether you use a Hot or Cold wallet, they are both fundamentally secured by a Seed Phrase (also called a Recovery Phrase or Mnemonic). Your Seed Phrase is the master key to ALL your crypto funds.It is a list of 12 or 24 simple words (e.g., apple, goat, river, shoe, ...). It is the only way to recover your funds if you lose your phone, your laptop crashes, or your hardware wallet is destroyed. Anyone who has your seed phrase has instant, permanent access to all your crypto.The Sacred Security Rule NEVER, EVER, under any circumstances, digitize your seed phrase. Do not:Take a photo of it. Type it into a notes app (even an encrypted one). Store it in the cloud (Google Drive, Dropbox, iCloud). Send it in an email or text message.The best practice is to write it down on paper or, for ultimate safety, engrave it onto a metal plate and store it in two separate, secure, fireproof locations.3. Recommended Wallets for the Solana Ecosystem For interacting with Solana’s DeFi and NFT landscape securely, you must pair a convenient Hot Wallet with a high-security Cold Wallet. A. Top Hot Wallets (Your Daily Driver)Phantom: The most popular Solana wallet, known for its beautiful, user-friendly interface and excellent NFT support. Top recommendation for beginners. Solflare: A powerful, Solana-native wallet that offers advanced staking tools and deep integration, making it a favorite for power users. Backpack: A newer, high-performance wallet popular among NFT collectors, offering unique xNFT (executable NFT) support.B. Top Cold Wallets (Your Vault) Every serious investor should own a hardware wallet. They integrate seamlessly with your Hot Wallet (e.g., you can link your Ledger to Phantom) so you can view your balance easily, but every transaction must be physically approved on the device.Device Name Key Feature Connection Method Get Your DeviceLedger Industry standard, Secure Element chip. USB / Bluetooth Secure Your Crypto with a Ledger Device TodayTrezor Fully open-source firmware, strong community trust. USB Explore Trezor's Secure Hardware WalletsKeystone Fully air-gapped security (no cables, only QR codes). QR Code Check out the Air-Gapped Keystone WalletTangem Credit card-like, battery-free, seedless option. NFC (Mobile Tap) Discover the Simple, Seedless Tangem WalletDisclaimer: Using the links above helps support our blog, and we only recommend devices we personally trust for cold storage. 4. Cold Wallet Comparison: Pros and Cons Choosing a cold wallet depends on your priorities: security architecture, usability, or a mobile-first experience.Wallet Key Pros (Advantages) Key Cons (Disadvantages) Best For...Ledger Broadest compatibility with dApps; Bluetooth (Nano X) for mobile use; large app ecosystem. Closed-source firmware (less transparent); past controversies regarding potential future recovery services. Beginners/Power Users who need extensive dApp/token support.Trezor 100% open-source software (maximum transparency); long-established reputation for security. Desktop-first experience (less mobile-friendly); generally fewer coins/apps than Ledger. Security Maxims who prioritize open-source and transparency.Keystone True Air-Gap via QR codes (zero cable/wireless vulnerability); large touchscreen for easy verification. Slow transaction signing due to QR code scanning; bulkier physical size; higher price point. Extreme Security for large, long-term holdings (the vault).Tangem Seedless option (no 12/24 words to write down); card form factor (convenient/durable); mobile-only NFC connection. Requires a minimum of two cards for backup (or a seed phrase option); no desktop app interface; verification done only on the phone screen. Mobile-First Users who want the easiest, most durable security solution.Bottom Line: The "Air-Gapped" Strategy For maximum security on Solana, combine the convenience of a hot wallet with the safety of a cold wallet:Keep 90%+ of your assets on a Cold Wallet (like Ledger, Trezor, etc.). Connect that Cold Wallet to your Hot Wallet (like Phantom). When you want to trade or interact with a dApp, you use the Hot Wallet interface, but the final, sensitive step (signing the transaction) must be approved physically on your offline hardware device.This way, even if your laptop or phone is hacked, the attacker cannot steal your funds because they don't have the physical hardware wallet to approve the transfer. Stay safe!
- Nefu
- 19 Dec 2025
- Airdrop farming
🪂 The Solana Airdrop Snowball: 4 Confirmed Farm Strategies to Claim Free Tokens
The Solana Airdrop Snowball: Your Guide to 4 High-Value Token Rewards Airdrops are a way for new protocols to bootstrap their community and reward early adopters. On Solana, airdrops are now one of the highest-value opportunities for retail crypto users. This guide provides a consolidated, step-by-step strategy for the four most sought-after, confirmed, or strongly rumored airdrop campaigns on Solana.Phase 0: The Essential Burner Wallet Strategy (IMPORTANT SECURITY WARNING) The single most important rule in airdrop farming is to NEVER use your main crypto wallet (your "Vault"). You must use a dedicated, separate wallet for this high-risk activity. The Burner Wallet Rule: A Burner Wallet is a secondary hot wallet (like a second Phantom account) that is used exclusively for interacting with new, un-audited, or experimental protocols. This prevents a malicious smart contract—often disguised as an airdrop claim or DeFi protocol—from draining your long-term holdings.⚠️ WARNING: ISOLATE YOUR FUNDS If you connect a malicious contract to your Burner Wallet, only the funds inside that Burner Wallet are at risk. If you connect your main wallet, you risk losing everything. Always transfer any airdrop wins or profits out of the Burner Wallet and into your secure Main Wallet (preferably cold storage) immediately.Getting Started:Need a Wallet? The recommended wallet for Solana is Phantom. If you don't have it set up yet: Read Our Step-by-Step Guide on How to Set Up Your Phantom Wallet HERE Need Crypto? To fund your Burner Wallet, you'll need SOL. If you don't know where to start: Read Our Guide to Top Exchanges and How to Buy SOL HERE1. Tensor ($TNSR): The NFT Marketplace Rewards Tensor is the leading NFT marketplace on Solana. They have confirmed their $TNSR token and run rewards programs (Seasons) where users earn Points for trading activity.Project Type Status Core Activity to FarmNFT Marketplace Token Confirmed ($TNSR) & Seasons Ongoing Bidding, Listing, and Market-Making on popular collections.Step-by-Step Farming Guide:Connect Burner Wallet: Go to Tensor and connect your dedicated Burner Wallet. Listing: List an NFT you own for sale on Tensor. You earn points simply for having an active listing. Tip: Use the Bonding Curve feature to automatically adjust the price. Bidding: Place a Bid on a popular collection (e.g., any trending Solana PFP project). The closer your bid is to the Floor Price, the more points you earn. Market Making: For maximum points, use the Market Making tool to simultaneously place bids and listings on a collection. Activity is Key: Perform these actions regularly across the current Season to earn the most 'Treasure Boxes' which contain the $TNSR allocation.2. Parcl ($PARCL): Decentralized Real Estate Trading Parcl is a Real World Asset (RWA) protocol where you can trade the price movements of major city real estate indices. They use a point system to reward users contributing to liquidity and trading volume.Project Type Status Core Activity to FarmDeFi / RWA Token Confirmed ($PARCL) & Point System Active Provide Liquidity and Trade on the perpetual market.Step-by-Step Farming Guide:Connect Burner Wallet: Go to Parcl and connect your Burner Wallet. Provide Liquidity: Deposit USDC into the Parcl Liquidity Pool (the 'Parcl Data Fund'). This is the highest-weighted activity for earning points. Trade Perpetual: Go to the Trade tab and take a long or short position on a real estate market (e.g., 'Miami,' 'New York'). Use a small amount of leverage. Hold & Compound: The longer you keep your liquidity staked, the more points you earn. You can compound your points for better future allocation. Referrals: The project strongly rewards users who invite others.3. Zeta Markets ($Z): Decentralized Derivatives Exchange Zeta Markets is a decentralized exchange (DEX) offering derivatives trading (futures/options) on Solana. They reward users based on their trading volume with an XP (Experience Points) system, which will determine the $Z token airdrop size.Project Type Status Core Activity to FarmDeFi / Derivatives Token Confirmed ($Z) & XP System Active High Trading Volume (buying and selling futures).Step-by-Step Farming Guide:Connect Burner Wallet: Go to Zeta Markets and connect your Burner Wallet. Fund Wallet: Deposit USDC into the Zeta Markets platform to use as collateral for trading. Place Trades: Go to the Futures market (e.g., SOL/USDC) and execute trades (both long and short). Volume is the main metric. Focus on Fees: Use Limit Orders when possible to act as a Maker, as this often accrues XP faster than taking market orders. Consistent Activity: Try to trade small amounts consistently rather than one large trade to demonstrate genuine, repeated use of the platform.4. Pump.fun: Memecoin Launchpad Pump.fun is the dominant platform for launching memecoins on Solana, generating massive fees and volume. The platform has confirmed an airdrop to reward early users, but the strategy requires careful risk management.Project Type Status Core Activity to FarmMemecoin Launchpad Airdrop Confirmed (Implied) Token Creation, Trading Volume, and Graduation participation.Full Farming Strategy and Details Due to the unique nature and high-risk mechanics of Pump.fun, the strategy for maximizing your allocation is extensive. For the comprehensive, step-by-step strategy, including speculative reward tiers and the Dune Airdrop Checker tool, please see our dedicated article: Read the Full Pump.fun Airdrop Strategy Guide Here⚠️ Airdrop Farming Safety ChecklistRevoke Approvals: Regularly check which dApps have permission to spend your tokens and Revoke unlimited spending approvals. Verify URLs: Always double-check that you are on the official URL before connecting your wallet. Move Wins: Transfer all valuable assets (tokens, NFTs, and airdrops) out of the Burner Wallet as soon as possible.

- Nefu
- 18 Dec 2025
- Getting started
10 Biggest Crypto Mistakes Beginners Make in 2026 (And How to Avoid Them)
Introduction to Common Beginner Mistakes in Crypto Cryptocurrency offers exciting opportunities, but the path is filled with challenges, especially for newcomers. Many beginners enter the market full of enthusiasm, only to face significant losses due to avoidable errors. Searches for terms like "crypto mistakes beginners" and "common crypto investing mistakes" remain popular because these issues persist year after year. In 2026, the landscape includes advanced DeFi protocols, widespread institutional adoption, and evolving regulations, yet the fundamental pitfalls stay the same. Issues like poor security practices, emotional decision-making, and lack of research continue to cost investors dearly. This guide breaks down the 10 biggest crypto mistakes beginners make today. Each section explains the error, why it happens, real-world consequences, and clear steps to avoid it. By understanding these, you can build a stronger foundation and reduce risks from the start. For context on key concepts mentioned here, refer to our crypto terminology glossary. Ready to take action safely? Explore our recommendations in the best crypto exchanges for beginners. The 10 Biggest Crypto Mistakes Beginners Make in 2026 1. Not Securing Your Assets Properly One of the most devastating errors is leaving funds on exchanges or using weak security measures. Beginners often think "it won't happen to me" until a hack or phishing attack drains their account. Exchanges are prime targets for cybercriminals, and even reputable platforms have faced breaches. In addition, losing access to a wallet due to forgotten seed phrases is irreversible on blockchain. How to Avoid It:Transfer assets to a personal wallet after purchase. Use hardware wallets for larger amounts and enable two-factor authentication everywhere. Always verify website URLs and never share private keys. Check our tutorials like how to set up a Phantom wallet for practical steps. 2. Falling for FOMO and Impulse Buying Fear of Missing Out drives many to buy at peak prices during hype cycles. Social media buzz around a token can create urgency, leading to purchases without research. When the hype fades, prices often crash, leaving buyers with heavy losses. How to Avoid It:Stick to a plan. Use dollar-cost averaging to buy fixed amounts regularly. Research projects thoroughly before investing. Our guide on how to buy crypto emphasizes measured approaches. 3. Ignoring Transaction Fees and Hidden Costs Beginners frequently overlook gas fees on networks like Ethereum or withdrawal charges on exchanges. These can erode profits, especially with frequent small transactions. High fees during network congestion turn profitable trades unviable. How to Avoid It:Choose low-fee platforms and networks. Compare options in our best crypto exchanges review. Time transactions during lower congestion periods. 4. Investing More Than You Can Afford to Lose Treating crypto like a get-rich-quick scheme leads many to overcommit funds needed for essentials. Market downturns can wipe out unprepared portfolios. How to Avoid It:Only invest disposable income. Start small to learn without high stakes. Diversify across assets and never borrow to invest. 5. Following Hype or Bad Advice Without Research Relying on social media tips, influencers, or friends often results in buying overhyped or scam projects. Many "pump and dump" schemes target newcomers. How to Avoid It:Conduct your own due diligence. Read whitepapers, check team credentials, and use tools like blockchain explorers. Build knowledge with resources like our terminology glossary. 6. Panic Selling During Market Dips Volatility triggers emotional sales at lows, locking in losses while missing recoveries. Bear markets test patience, but history shows cycles of recovery. How to Avoid It:Adopt a long-term mindset. Set stop-loss orders wisely and avoid constant price checking. Focus on fundamentals rather than short-term fluctuations. 7. Not Diversifying Your Portfolio Putting everything into one coin, often Bitcoin or a trending altcoin, exposes you to unnecessary risk. If that asset fails or underperforms, the impact is severe. How to Avoid It:Spread investments across established coins, sectors like DeFi, and stable assets. Rebalance periodically. 8. Using High Leverage Without Experience Leveraged trading amplifies gains but also losses. Beginners often get liquidated quickly in volatile conditions. Many platforms promote leverage aggressively. How to Avoid It:Start with spot trading. Gain experience before considering margins or futures. Understand risks fully. 9. Storing Seed Phrases Unsafely or Losing Access Writing seed phrases on digital devices or losing physical copies leads to permanent loss of funds. No central authority can recover blockchain assets. How to Avoid It:Store seed phrases offline in secure locations, like engraved metal plates. Use multisig wallets for added protection. Never screenshot or email them. 10. Chasing "Moonshots" or Low-Priced Coins Blindly Believing cheap tokens will explode because of low entry price ignores market cap and fundamentals. Most low-cap projects fail. How to Avoid It:Evaluate based on utility, adoption, and team. Focus on quality over quantity. Use established entry points outlined in our buying guides. Additional Tips for Long-Term Success in Crypto Beyond avoiding these mistakes, build habits like staying informed through reputable sources, tracking taxes on transactions, and regularly reviewing your strategy. The market evolves, but disciplined approaches endure. Security remains paramount—combine knowledge from this guide with practical tools in our wallet setup articles. Conclusion: Learn from Others to Protect Your Journey These 10 mistakes represent lessons learned by countless investors before you. By recognizing them early, you position yourself for better outcomes in 2026 and beyond. Start safely: Review secure platforms in our best crypto exchanges guide or deepen basics with the crypto glossary. Crypto rewards preparation and patience. Take measured steps, learn continuously, and avoid rushing into decisions. Your future self will appreciate the caution.
- Nefu
- 16 Dec 2025
- Security privacy
The Step-by-Step Guide to Setting Up Your Trezor Hardware Wallet
🛡️ Maximum Defense: Setting Up Your Trezor Hardware Wallet Trezor, the original hardware wallet, is lauded for its open-source security model. Its setup process, managed through the Trezor Suite application, is slightly different from other wallets, focusing heavily on on-device confirmation to maximize security. Phase 1: Purchase and Initial Security Check 🛑 Security First: Where to Buy Your Trezor To guarantee you receive a pristine, untampered device, you must avoid third-party resellers.CRITICAL WARNING: NEVER purchase a Trezor device from Amazon, eBay, or any unofficial third-party. Only buy directly from the manufacturer. If your device appears to have been opened, or if it comes with a pre-written Secret Recovery Phrase, DO NOT USE IT and contact Trezor Support immediately.Always purchase directly from the manufacturer.Secure Your Device: Buy Directly from Trezor Here⚖️ Comparing the Trezor Models Trezor offers two main models, the cost-effective Model One and the feature-rich Model T.Model Approx. Price (USD) Key Features Best ForModel One $69 Monochrome screen, 2 physical buttons, 24-word Seed phrase default. Budget-conscious users, focusing on major assets (BTC, ETH, LTC).Model T $179 Color Touchscreen, USB-C, on-device PIN/Passphrase entry. Advanced users, multi-asset investors (supports more coins like XRP, ADA, XMR), and superior privacy.Phase 2: Device Setup and Initialization Step 1: Install Trezor SuiteDownload and install the official Trezor Suite application (desktop or web) from the Trezor website (suite.trezor.io). Never use a third-party link.Step 2: Connect and Install FirmwareConnect your Trezor device to your computer. The screen will display a lock symbol. In Trezor Suite, click "Set up my Trezor." Since Trezor devices ship without firmware, Trezor Suite will immediately prompt you to "Install firmware." Confirm this, as it is a required safety check to ensure authenticity. Once the firmware is installed, select "Create new wallet."Step 3: Write Down Your Secret Recovery Phrase (Seed Phrase) This list of words is the ONLY backup of your funds. It is priceless and must remain secret and offline.Select "Standard Seed Backup" (unless you are using the advanced Shamir Backup feature on the Model T/Safe series). The Trezor screen will display your 12, 20, or 24-word phrase one word at a time. Use the Recovery Card(s) provided in the box to write down each word in the exact sequential order. After writing, the device will prompt you to confirm a few random words to verify your transcription.Step 4: Set Your PINIn Trezor Suite, select "Set PIN." Your Trezor device will display a randomized 3x3 grid of numbers. For Model One: Look at the grid on your Trezor screen. On your computer screen, click the corresponding dots on the blank keypad to enter your PIN. The numbers change position every time for security. For Model T: Enter your PIN directly on the device's touchscreen. Confirm your PIN a second time to finalize the security setting.Step 5: Activate Coins and Access SuiteSelect which cryptocurrency accounts you want to activate (e.g., Bitcoin, Ethereum). This can be changed later. Click "Complete setup," and you can now access your Trezor Suite, which acts as your secure portal for sending, receiving, and managing your crypto.Phase 3: Trezor’s Unique Security Features 🔑 Passphrase (Hidden Wallet) Trezor strongly encourages using a Passphrase—a custom phrase (like a second password) that creates a "Hidden Wallet."How it works: When you connect your Trezor, if you enter your 24-word seed phrase plus a Passphrase (e.g., “MySecretGarden123”), it generates a completely separate wallet address. If you enter the 24-word seed without a Passphrase, it opens your "Standard" wallet. Security Benefit: This creates "plausible deniability." If you are physically coerced into unlocking your wallet, you can give up your PIN and the funds in the visible "Standard" wallet, while your significant funds remain safe in the invisible "Hidden Wallet."📝 Understanding Word Length (BIP-39 vs SLIP-39) Trezor uses different word lengths depending on the model and the desired backup method:Word Length Standard Default for: Security Context12 Words BIP-39 Model T, some new models Standard 128-bit security. Safe because the PIN is required on the touch device.20 Words SLIP-39 Trezor Safe 3/5 (newer) Used for Shamir Backup, which splits the phrase into multiple secure "shares."24 Words BIP-39 Model One Used for greater security on the Model One, as the recovery entry is done via the computer.🏠 Best Practices for Storing the SRPKeep it Offline and Separate: Never photograph, store digitally, or keep the phrase near your device. Durable Backup: Use the paper card provided, but a stamped metal backup is highly recommended to protect against fire, water, and time. Secure Multi-Location: Store your copies (especially the passphrase, if used) in separate, secure locations (e.g., a home safe, a bank safety deposit box, or with a lawyer).Phase 4: Maintenance and Funding 🔄 Updating Your Trezor Firmware Firmware updates are done through Trezor Suite and are necessary for security.Open Trezor Suite and connect your device. If an update is available, Trezor Suite will prompt you. Follow the instructions in the app and on your device. The device will confirm a unique fingerprint before installation. Always ensure your recovery phrase is accessible during this process, as a firmware update carries a small risk of resetting the device.💸 Funding Your Cold Storage After setup, you can transfer assets from an exchange to the secure addresses generated in Trezor Suite.Need a guide on which exchange to use or how to make your first crypto purchase? Read Our Complete Guide to the Best Crypto Exchanges and Buying Process Here
- Nefu
- 15 Dec 2025
- Getting started
Best Crypto Debit Cards That Pay Rewards in 2026
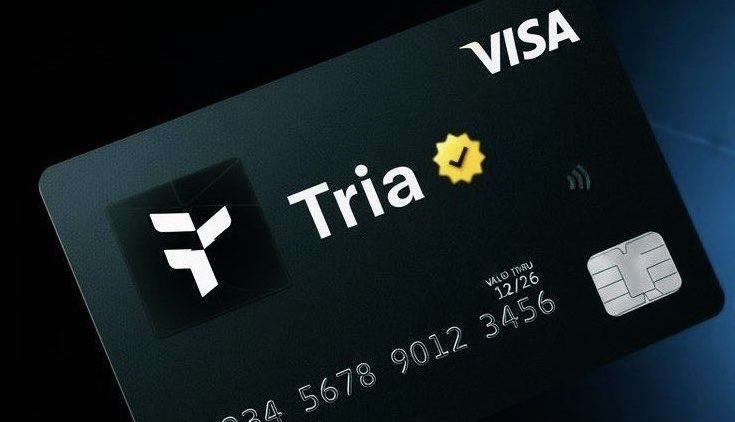
📊 Quick Comparison Table: Best Crypto Debit Cards 2026Card Rewards Type Pros Cons LinkTria Card Up to 6% TRIA Self-custodial Global support, high cashback, stablecoin-friendly Newer product, token-denominated rewards Tria CardCoinbase Card Up to 4% crypto Exchange-linked Beginner-friendly, widely accepted, no annual fee Conversion fees, occasional support issues Coinbase CardGnosis Pay Card Up to 5% GNO Self-custodial No FX fees, strong decentralization Limited global availability, Web3-heavy interface Gnosis Pay CardReady Metal Card ~3% partner tokens Premium metal Premium feel, European support Region-locked, token-denominated rewards Ready Metal CardBybit Card 4–10% crypto Exchange-linked High rewards for traders, multi-crypto Reward tiers tied to usage, occasional volatility Bybit CardBleap Card ~2% USDC Self-custodial Stablecoin cashback, predictable rewards Limited availability, small user base Bleap CardBitMart Card Up to ~3.5% Exchange-linked Solid cashback, wide acceptance Best for BitMart users only, support delays BitMart CardCrypto.com Visa Card 0–5% (CRO stake) Exchange-linked Global coverage, perks for higher tiers Requires CRO stake, token volatility Crypto.com Visa CardWhy Crypto Debit Cards Still Matter in 2026 Crypto debit cards let you bridge the gap between digital assets and everyday spending. They allow users to:Spend crypto directly or via automatic conversion to fiat Earn rewards (cashback or token-based) on daily purchases Use the card globally, online and in-store, like a traditional debit cardFor beginners, these cards provide convenience, real-world utility, and a way to earn while spending crypto.What to Look For in a Crypto Debit Card Before selecting a card, check for:Regional availability — some cards are restricted to certain countries Custody or staking requirements — some cards require holding or staking their native token Fees and limits — monthly/annual fees, conversion rates, or cashback caps Reward type — stablecoin vs token rewards (volatility considerations)Full Reviews 🟦 Tria Card The Tria Card is a self-custodial Visa card supporting over 1,000 cryptocurrencies and available in 150+ countries. It offers up to 6% cashback in TRIA tokens and does not require staking. Its global accessibility and strong rewards make it ideal for crypto users seeking full custody.Pros: High cashback, global support, self-custody, stablecoin-friendlyCons: Newer product, fewer long-term reviews, token-denominated rewardsTria Card →🟩 Coinbase Card The Coinbase Card integrates seamlessly with your Coinbase wallet, allowing you to spend crypto or fiat and earn up to 4% crypto rewards. It’s beginner-friendly, widely accepted, and has no annual fees.Pros: Trusted brand, simple onboarding, multiple reward options, no annual feeCons: Conversion fees (~2.49%), occasional support issues, regional limitationsCoinbase Card →🟧 Gnosis Pay Card The Gnosis Pay Card is designed for decentralized finance enthusiasts. It offers up to 5% cashback in GNO tokens, zero FX fees, and is fully self-custodied. Users value the decentralization and low-cost spending.Pros: No FX fees, strong decentralization, clean rewards, low costCons: Limited global availability, Web3-heavy interfaceGnosis Pay Card →🟫 Ready Metal Card The Ready Metal Card is a premium European metal debit card offering ~3% cashback in partner tokens. It is praised for its aesthetics, ease of use, and European merchant support.Pros: Premium feel, decent rewards, strong European supportCons: Region-locked, token-denominated rewards, slow verification during peak periodsReady Metal Card →🟪 Bybit Card The Bybit Card is ideal for active traders. Cashback ranges from 4–10%, depending on spending category and user tier. It integrates with Bybit’s exchange, making crypto management straightforward.Pros: High rewards, great for frequent traders, multi-crypto supportCons: Reward tiers tied to Bybit usage, occasional transaction volatilityBybit Card →🟨 Bleap Card The Bleap Card is non-custodial and offers ~2% cashback in USDC, making it popular among users who prefer stablecoin rewards. It has low FX fees and is simple to use.Pros: Stablecoin cashback, self-custody, predictable rewardsCons: Limited availability, smaller user base, basic interfaceBleap Card →🟥 BitMart Card The BitMart Card is an exchange-linked Visa card with up to ~3.5% cashback. It’s best for existing BitMart users and integrates seamlessly with account balances.Pros: Strong exchange integration, solid cashback, wide acceptanceCons: Best for BitMart users, support delaysBitMart Card →🟦 Crypto.com Visa Card The Crypto.com Visa Card is highly established, offering 0–5% cashback depending on CRO token stake tier. It provides perks like streaming subscriptions at higher tiers.Pros: Global coverage, strong app, high rewards with stakingCons: Requires CRO stake, historical reward cuts, token volatilityCrypto.com Visa Card →How to Choose the Right CardSelf-custody & predictable rewards: Tria, Gnosis Pay, Bleap Beginner-friendly with wide integration: Coinbase, BitMart High rewards for active traders: Bybit, Crypto.com (with CRO stake) Premium feel / European market: Ready MetalAlways check availability in your region and understand fee structures before applying.Conclusion Crypto debit cards remain highly relevant in 2026. The best card depends on your priorities:Custody vs convenience Token rewards vs stablecoin Global usability Required staking or holdingsUsed responsibly, they let you spend crypto while earning rewards. Many of these cards offer signup bonuses or promotions—check the official sites for the latest details. If you looking to buy crypto Our guide on how to buy crypto will help you on your way.

- Nefu
- 15 Dec 2025
- Security privacy
How to Audit Smart Contracts on EVM and Solana
Don't Deploy, Verify: A Beginner's Guide to Smart Contract Audits (EVM & Solana) In the decentralized world, code is law. A smart contract, once deployed, cannot be easily changed, and a single vulnerability can lead to millions in lost funds (a "hack"). Whether you are a DeFi user wanting to understand security reports or a new developer building your first token, understanding the audit process is non-negotiable. This guide breaks down the essential four-step process for auditing smart contracts on the two dominant ecosystems: EVM-compatible chains (like Ethereum, which uses Solidity) and Solana (which uses Rust).What is a Smart Contract Audit? Simply put, a smart contract audit is a methodical, in-depth inspection of the contract's code by security experts. Its goal is not just to check for basic bugs, but to uncover deep security flaws, logic errors, and vulnerabilities that an attacker could exploit to steal assets, halt the contract, or manipulate its intended function. The Four Phases of Every Audit Professional audits—whether for a simple EVM token or a complex Solana DeFi protocol—follow a consistent lifecycle: Phase 1: Pre-Audit & Documentation This is the planning stage. The audit team gathers all documentation from the project developers.Code Freeze: The developers must stop making changes to the code. The audit is performed on a fixed snapshot of the code. Requirements: Auditors study the whitepaper and technical specifications to understand what the contract is supposed to do. (Example: "Users must be able to stake token X and only receive token Y as a reward.") Test Cases: Auditors run the unit tests written by the developers to ensure the basic functions work as intended.Phase 2: Automated Testing (The Robot Check) Before any human eyes scan the code, the contract is fed into specialized security tools. These automated scanners perform the essential "sanity check," quickly catching the easiest and most common flaws. Why Pros Use Automated Tools: Even the best human auditor can miss a simple overflow error in 10,000 lines of code. Automated tools are essential because they:Enforce Best Practices: They check code against libraries of known vulnerabilities and coding standards. Ensure Consistency: They guarantee that the same rigorous checks are applied to every function, every time. Save Time: They handle the basic checks, allowing human auditors to focus their time on complex business logic and unique attack vectors.Essential Automated Audit ToolsEcosystem Language Tool Name Key Function / What it ChecksEVM Solidity / Vyper Slither A powerful static analyzer that reports vulnerabilities (like reentrancy), suggests optimizations, and generates a visual inheritance graph of the contract.EVM Solidity Mythril Uses symbolic execution to explore every possible execution path of the contract, identifying potential attack vectors and exceptions.EVM Solidity Echidna A fuzzer that generates random, meaningful inputs to test contract properties (invariants) and break them under unexpected conditions.Solana Rust / Anchor Cargo-Audit Checks the project's dependencies against a database of Rust security advisories, ensuring no existing vulnerability is imported.Solana Rust / Anchor Clippy The standard Rust linter. It checks for common code mistakes, style issues, and often spots functional errors or inefficient coding patterns.Both - Formal Verification (e.g., CertiK's engine) A highly advanced technique that mathematically proves a contract's logic is correct and adheres to its specifications, eliminating entire classes of errors.Beginner Tip: Automated tools are fast, but they often produce false positives (flagging secure code as risky) or miss complex logical errors that only a human can spot. This is why the next phase is crucial.Phase 3: Manual Review (The Deep Dive) This is where the human expertise comes in. A security researcher manually reads every line of code to find the flaws the automated tools missed.Logic Review: Checking if the code makes sense against the project's requirements. Does a function allow the owner to accidentally lock up all the funds? Attack Vectors: Auditors think like hackers, attempting to exploit common vulnerabilities: Reentrancy: Can a function be recursively called to drain funds (a famous Ethereum attack)? Access Control: Are critical functions (like updating parameters) protected so only the owner or governance can call them? Front-Running: Can users see a pending transaction and execute a trade ahead of it for profit?Architecture Review: Checking how different contracts or programs interact, especially on Solana where Cross-Program Invocation (CPI) introduces unique security risks.Phase 4: Reporting, Remediation, and Final Report The findings are compiled and published for the developers and the public.Initial Report: Auditors classify every issue found by severity (Critical, Major, Medium, Minor, Informational). Remediation: The developers work to fix the issues based on the report's recommendations. Re-Audit (Optional but Recommended): The auditors check the fixed code to ensure the patches didn't introduce new problems. Final Report: The public document is released, showing the original findings and noting whether each vulnerability was Resolved or remains Unresolved.Key Vulnerabilities to Look For (The Common Red Flags) When reading an audit report or reviewing a contract, keep an eye out for these classic vulnerabilities: EVM (Solidity) SpecificsInteger Overflow/Underflow: This happens when a number gets too large or too small for its data type. Since Solidity v0.8.0, this is checked automatically, but it is a major issue in older or unchecked code. Function Visibility: Functions meant to be called internally are accidentally marked public, allowing anyone to execute them. Gas Optimization: While not a security flaw, inefficient code can cost users much higher transaction fees (Gas).Solana (Rust) Specifics Solana's design introduces an account model that requires careful checks.Account Validation/Cranking: On Solana, the calling program must pass all necessary accounts to a function. If the program fails to validate that the accounts are correct, signed, or belong to the right program, an attacker can substitute a fake account. Signer Checks: The program must ensure that the expected user wallet has actually signed the transaction before performing a critical action (like withdrawing funds). Anchor Constraints: If using the Anchor framework, auditors check for correct usage of #[account] constraints, which are essential for security.The Takeaway for DeFi Users As a user, you are the final check. When a project launches:Look for a Public Audit Report: If a project doesn't have one, it's a huge red flag. Check the Firm's Reputation: Is the audit from a known, respected firm, or an unknown entity? Read the Severity: Don't panic over "Informational" or "Minor" findings, but Critial and Major bugs must be marked as Resolved before you consider investing.The audit is a stamp of approval—not a bulletproof vest—but it shows the team has taken security seriously. Reputable Smart Contract Auditing Firms When checking a project's documentation, look for reports from firms known for their rigor and expertise across multiple chains. Note that many firms specialize; some are best for EVM, others for Solana or cutting-edge cryptographic systems.Firm Name Primary Specialization Key FocusCertiK Multi-chain (EVM, Solana, etc.) Formal Verification (mathematical proof) and AI-powered real-time monitoring (Skynet).Trail of Bits High-Assurance, Infrastructure Known for deep security research, high-stakes audits, and advanced cryptographic systems.OpenZeppelin EVM (Ethereum ecosystem) Provides standardized, secure Solidity libraries and is a core developer-focused security partner.Quantstamp Multi-chain (EVM, Solana, etc.) Focuses on consistency, depth, and pioneering work in formal verification.Hacken Multi-chain (EVM, Solana, etc.) Comprehensive security suite including smart contract audits, bug bounties, and compliance.PeckShield EVM, Monitoring Strong expertise in smart contract audits and real-time on-chain vulnerability monitoring/incident response.Halborn Solana & EVM Actively collaborates within the Solana ecosystem and provides full-stack security services.ConsenSys Diligence EVM (Ethereum ecosystem) Backed by the ConsenSys team (MetaMask), specializing in high-profile Ethereum projects (Aave, 0x).

- Nefu
- 12 Dec 2025
- Defi yield
How to Launch a Memecoin on Pump.fun
Launch Your Legacy: A Guide to Pump.fun Memecoin Creation Pump.fun has fundamentally democratized crypto creation, allowing anyone to mint a new token on Solana for the cost of a cup of coffee. However, the technical launch is just the first 5% of the battle; the remaining 95% is driven by community and marketing. This guide walks you through the initial steps, explains the lucrative fee structure, and shows you exactly why the success of your token depends on relentless community engagement.Phase 1: Costs, Mechanics, and Creator Fees Pump.fun's model is designed for a fair launch, meaning developers cannot pre-mine tokens for themselves—they must buy their initial supply just like everyone else. There is a practice called bundles where devs are able to acquire multi wallets worth of coins at the very launch in the 1st transaction block where the coin is created to give them a unfair advantage. More on that later. Read til the end for more information on that. Initial Cost & FeesItem Cost PurposeToken Creation Fee ~0.02 SOL (approx. $3–$5 USD) The mandatory fee to deploy the token's initial metadata and bonding curve contract.Gas/Transaction Fees Minimal (~$0.005) Fees for connecting your wallet and confirming the creation transaction.Initial Buy (Optional) Recommended 0.5 - 2 SOL Your first purchase to acquire tokens for marketing, giveaways, and to signal confidence.The Dynamic Creator Fee (Project Ascend) Pump.fun rewards successful creators via a dynamic fee structure called Creator Fees. You earn a percentage of every trade made on your token's bonding curve.Mechanism: Creators earn a percentage of the total trade volume, which scales dynamically based on the token's market cap, and volume. The more poeple buy and sell your coin the more fees you earn. Incentive: The highest fee percentage (around 0.95% of volume) is paid when your token is in the crucial growth phase (approx. $88k - $300k market cap). This ensures the creator is highly incentivized to promote and shepherd the token during its most volatile period.The Graduation Mechanism The core goal of any Pump.fun launch is to Graduate. Coins start off at 5k mc and then rise from each purchase, with community members adding to the pumpswap liquidty pool.In the beginning When your token's market cap reaches the target threshold (historically $69,000 USD), the funds accumulated on the bonding curve are used to create a liquidity pool (LP) on a major DEX like Raydium, but since then pumpfun has launched their own Dex called pumpswap, so the liquidity pool is created directly with pumpswap now. The corresponding LP tokens are then burned, effectively locking the liquidity forever and securing the token's trading future on the broader Solana ecosystem.Phase 2: The 5-Step Pump.fun Launch Guide The process is designed to be completed in under five minutes. Step 1: Prepare Your Wallet & FundsUse a Solana-compatible wallet (Phantom, Solflare, Backpack). Ensure your wallet is funded with at least 0.25 SOL to cover the creation fee and your initial token purchase.Step 2: Access the Platform & Start CreationGo to the official Pump.fun website. Click "Connect Wallet" and link your Solana wallet. Click the button to "Start a new coin."Step 3: Define Your Token’s IdentityFill out the simple form: Name: The full name of your token (e.g., "Meme God Coin"). Ticker: The short symbol (e.g., "MGOD"). Description: A catchy, engaging summary of the idea. This is your first marketing pitch! Image: Upload your token's logo/meme graphic.Step 4: Link Your Socials (Crucial Step)You will be prompted to add links. This is mandatory for serious projects. Traders have tools that they use to filter out projects that don't fit within a criteria. Having a least one social or more may cause you get traders, whereas if you add no socials you might get filtered out. Add links to your dedicated X (Twitter) account and your Telegram community. This immediately gives buyers a place to go and verifies you are planning for a community-driven project.Step 5: Finalize and Buy Your SupplyApprove the ~0.02 SOL creation fee transaction in your wallet. The bonding curve will immediately start. You will be prompted to make your initial purchase. This is the only way to acquire developer tokens. Buy a reasonable amount (e.g., 0.5-2 SOL worth) to hold for marketing and giveaways. Once confirmed, your coin is LIVE and immediately tradable on the Pump.fun bonding curve.Phase 3: The Secret Sauce - Community & Promotion The vast majority of tokens on Pump.fun fail not because they have a bad meme, but because they have a weak launch strategy and no community engagement. Once your token is live, the clock is ticking, and the goal is to hit the $69,000 Graduation threshold. Around this time people join your community and start shilling the coin on social media platforms in order to get more people to join. Why Socials are Non-Negotiable:Trust & Legitimacy: Links to an active X and Telegram signal that the project has a team behind it and isn't a likely abandoned project. The FOMO Engine: Memecoins are driven by hype. You must have dedicated social channels to post fresh memes, push community buy contests, and create relentless chatter. The Shilling Requirement: Your project needs constant visibility in key crypto communities, Telegram groups, and under popular crypto tweets. If people aren't talking about your coin, they aren't buying it. Communities who raid kols or larger pages, often win visibility for free as they are using the reply guy strategy to grow the coins popularity.Building and maintaining this level of high-volume, 24/7 engagement is exhausting and is the single biggest failure point for new creators.Next Level: Accelerate Your Community with Professional Support Successfully launching a token requires constant vigilance and hyper-responsive community management, especially in the first 72 hours. This is where most creators run out of steam, and their token dies from lack of chatter. My Reply Guy Services are designed to solve this exact problem: I offer professional community engagement and reply guy services to ensure your project's X (Twitter) presence remains active, positive, and constantly visible in the feeds that matter, right from your TGE (Token Generation Event) and beyond.Pre-Launch Hype: We help build anticipation and start the initial shilling campaign. Launch Day Engagement: We flood the necessary feeds with buy confirmations, memes, and positive comments to sustain the initial pump. 24/7 Community Support: We act as your dedicated front-line team, maintaining chatter and enthusiasm so you can focus on the project's big picture.Ready to launch and ensure your token's success is backed by professional community support? Contact me today to discuss my tailored Reply Guy Service packages for your Pump.fun project. Watch out for Scams, once a coin is launched, it only takes seconds to minutes for a Dev, or community to dump all their coins on your head. You need to be able to read on chain data, check several tools to see if the coin is bundled, or check the contract to make sure its a safe contract to interact with. Some coins are launched for the sole purpose of dumping the coin later, and some coins are serious but still die because the hype and attention goes else where. ```